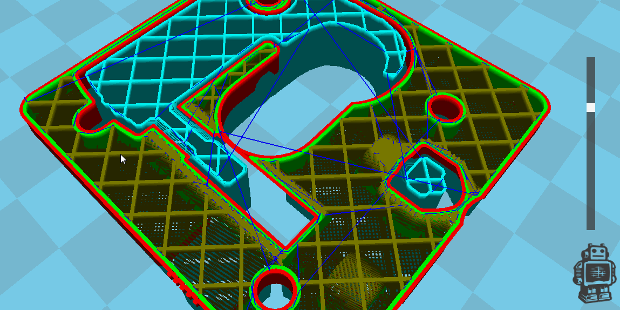
Cura is the last software link in the 3D printing chain. Developed in open source by Ultimaker, it is found on all platforms. We will see how to install and use it on Linux with our Dagoma Discovery 200.
Cura provides, in this order, the following features of the 3D printing chain:
- The arrangement
- The supports
- The slicing
- The Gcode translation
The arrangement involves loading one or more objects into the virtual bed of the printer, placing, rotating, or scaling them.
Reinforcement consists of automatically calculating additions of material for supporting the parts of our object that will need it. There are two types of reinforcements: The raft, which serves as a foundation for an object, preventing it from coming off during printing (I have experienced this since my very first impression); and the supports, which to keep the analogy of the building, are scaffoldings used to support the parts of the object that would be cantilevered without, and therefore would not be printable.
Slicing is the cutting of a 3D object in layers that will be deposited successively one on top of the other on the bed of the 3D printer.
The conversion into Gcode consists of converting these 2 dimensions slices, into motion and actions commands, understandable by the printer. For example: Heat the nozzle up to 210°C, move for 2 cm on the X axis, then 1 cm on the Y axis, etc. For your information, the Gcode is a standardized language that drives all types of CNC machines (3D printers, CNCs, laser cutters, etc.).
At the time of writing, Cura is available in version 15.04.4 under Linux, and this is the one I installed. The Ultimaker website should detect your operating system, but not your architecture. You will find the 64-bit version of Cura on the versions list.
The installation is fairly simple, but the big difference between Windows / Mac and Linux is that under Linux we do not have access to the Cura by Dagoma version, pre-configured version for the Discovery200. Never mind, Dagoma has written a very specific tutorial on its setting (in French).
Under Linux, we jump directly to option 2 and will setup our printer manually, without using an .ini file.
Note that Cura is available in French, but screenshots of the tutorial are in English. I would say that they come from the Mac version of Cura. It may be worth it to set Cura in English the time of the configuration if you do not handle both languages fluently.
The only difference I could detect between the tutorial and the software is the nozzle size, which is in the first tab in the application, and in the second one on the screenshots.
When we fill the start section, which contains the beginning of any Gcode file that will be generated by the application, we will take care to fix the starting nozzle height that we have determined for our printer during calibration.
In general, I make sure to activate the reinforcements systematically everywhere. They will of course only be present if they are needed. As hanging type, I use either None, if the piece has a large surface “on the ground” and is not very high; otherwise I choose raft, which prevents the nozzle from falling down the peace by leverage when it starts to gain height.
When you save the Gcode file with Cura, it names it after the name of the original object. As stated in the Dagoma tutorial, you should always rename it to “dagoma0.g” for the Discovery200 to see it.
The object download platforms are usually very well supplied, and one quickly spend a phenomenal time browsing their online catalogs. For my part, I use Thingiverse a lot. You can find Dagoma there, or me 🙂
