I bought myself a first spool of ABS filament. But before trying it, I wanted to prepare my printer for it. ABS requires higher temperatures than PLA, both at the nozzle and bed levels, and ideally printer confinment. Here is my feedback on the bed isolation for ABS printing.
I decided this time to share with you the list of materials that I used in the form of Amazon links at the end of the article. If you are interested in the material I have used, you can order it by earning me a commission to support my blog. I have no idea how this system works, so it will be a discovery.
The interest
Let’s start at the end! What is the difference with the isolation of the board?
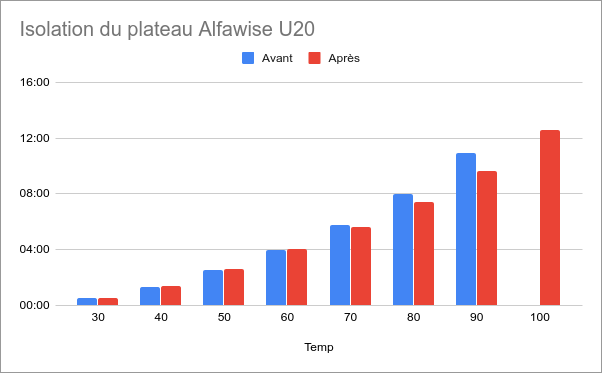
On this graph we can see that up to 60°C, it does not change much.
| Temperature | Before | After |
| 30°C | 00:32 | 00:30 |
| 40°C | 01:19 | 01:22 |
| 50°C | 02:31 | 02:37 |
| 60°C | 04:00 | 04:02 |
| 70°C | 05:48 | 05:36 |
| 80°C | 08:00 | 07:26 |
| 90°C | 10:57 | 09:39 |
| 100°C | — | 12:33 |
The figures even tell us that it is slightly worse! On the other hand, past 60°C, an isolated bed begins to save you heating time, and therefore energy. This also applies during printing, to maintaining the temperature. The initial temperatures were 20°C when I tested without isolation, and 21°C when I tested with it. The Alfawise U20’s thermostat goes up to 100°C. During my test without insulation, I thought that the temperature actually leveled out at 90°C because the measured temperature oscillated between 89°C and 90°C without ever exceeding 90°C. The insulation test proved me wrong.
If I sum up, isolating your tray is of little use if you only want to print in PLA, because you will not exceed 60°C. Your printer will then (very slightly) consume more energy and will (very slightly) take longer to warm up before printing. On the other hand, maintaining the temperature should be more economical throughout the printing (not measured). In addition, if you read the article to the end, you will understand that your plate will be (always very slightly) heavier, and will risk hitting the Y-axis motor if you miss it.
On the other hand, if you want to print in ABS, isolating your plate will allow you to exceed 90°C, to gain (very slightly) in heating time and in energy saving, both in pre-heating and during printing.
Installation
This is not a tutorial, but a sharing of experience. I do not pose as an expert, far from it, but I got out, and rather not bad, I think.
I started by putting the glass tray aside, in a safe place, and being careful not to put my big dirty fingers on it.
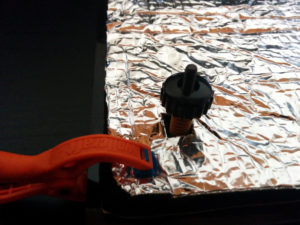
I positioned the foam on the back of the tray and held it in place with the pliers to mark the locations of the screw holes on the cardboard.
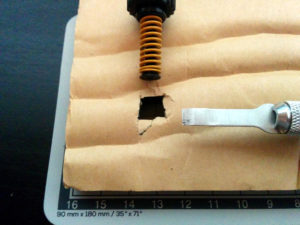
I used a small straight blade mounted on the exacto-knife to make holes a little larger than those of the screws in order to pass the spring without it touching the foam too much.
Before gluing, I set up, maintained with the pliers, and I installed the screw / spring / wheel assemblies, to validate everything.
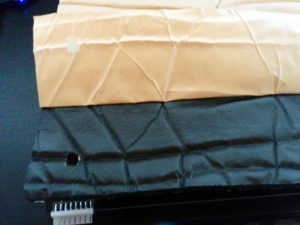
I removed the cardboard strip by strip to ease the installation of the foam. If you remove all the cardboard, the foam will stick wherever it can, it complicates enormously.
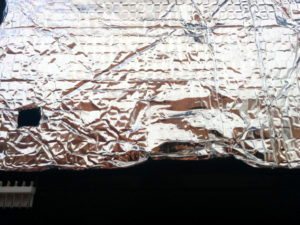
Once the foam had been glued, I let it cure for 24 hours with a little weight on the tray, placed on a flat surface. The next day, I put the bed back on the printer. I put it in the lowest possible position, then I carefully lowered the print head to zero Z, taking care not to touch the plate.
I finally made a leveling of the plate, in two stages (first at 1mm from the head, then conventionally, with a thickness of sheet of paper. It was then that the drama occurred 🙂
At the first homing of the Y axis, the engine could no longer pass under the plate, as expected. The foam prevented it. I immediately turned off the printer when I heard the characteristic noise of the axis being prevented from turning.
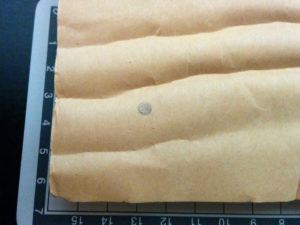
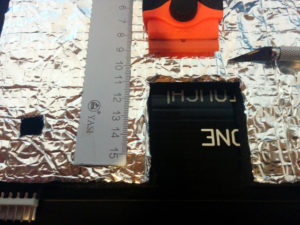
In the following photo, we can see the point of impact, but with the naked eye the marks were much more visible. There had already been marks (that you can barely make out) when you upgraded. I did not realize it at the time, but they helped me to identify the width and the length that my cut should have.
I carefully cut the reflective part (probably aluminum) very straight, taking care not to descend with the exacto lower than necessary. Then I got down on the foam, without touching the bottom surface of the tray. I ended up scraping the remaining foam with the nail, then with my plastic blade scraper. I finished with acetone on a paper towel.
I was finally able to reassemble the heating bed, clean it with acetone as long as I had it on hand (fingerprints can be very corrosive over time), reassemble the glass plate, redo a leveling, and check with homing that the engine was running well. I ended the session by measuring the heating times in the table above.
Products and tools used
This insulating foam for 3D printer heating bed exists in 22 cm and 30 cm. It is slightly smaller than the bed’s plate, which leaves space for the clamps and the power connector. I bought the 30cm model for my Alfawise U20 in June 2020.
The Wolfcarft Microfix pliers were used to hold the foam on the bed before gluing. Having not bought them from Amazon, I do not have the date of purchase, but I would say between 2008 and 2010. They serve me in all types of work and I am very happy.
This exacto-knife is supplied with 3 handles and 13 different blades in a very solid box. The box also contains a small cutting board, which probably made me buy this product rather than another. I bought it in January 2020, and I use it very often to make cardboard models of furniture or for the finishes of my parts printed in PLA. I can no longer find the product sheet, but I also bought a box of 120 spare blades, which is small enough to fit inside the box of the exacto-knife. All foam cuts were made with this tool.
This metal ruler / protractor / square set never leaves my exacto-knife. They are very small, supplied in a handy plastic box to store. I bought them in February 2020 and mainly use them to make cardboard models of furniture. They allowed me to make a straight cut for the passage of the Y axis motor.
In 2018 I bought this scraper for ceramic hobs. I use it every winter to clean the glass of my fireplace insert, but it also has plastic blades, which I used here to clean the part of foam that I had to remove to free up space for the engine Y-axis.
