Traduction Française du chapitre 3 de la documentation de Flight Gear.
Décollage : Comment lancer le programme
3.1 – Variables d’environnement
Il y a deux variables d’environnement qui doivent être définies pour faire fonctionner FlightGear. Elles indiquent à FlightGear où trouver ses données et ses paysages.
Vous pouvez les paramétrer de plusieurs façons selon votre plateforme et vos conditions.
3.1.1 – FG_ROOT
Il s’agit de l’emplacement où FlightGear trouvera ses fichiers de données sur les avions, les positions des balises de navigation, ou les fréquences d’aéroport. C’est le sous-répertoire data de votre dossier d’installation de FlightGear. Par exemple /usr/local/share/FlightGear/data ou c:Program FilesFlightGeardata.
3.1.2 – FG_SCENERY
C’est l’emplacement où FlightGear recherchera ses fichiers de paysage. Il se compose d’une liste de dossiers qui seront examinés dans l’ordre. Les dossiers sont séparés par « : » sur Unix et « ; » sur Windows.
Par exemple, avec FG_SCENERY valant :
c:Program FilesFlightGeardataWorldScenery;c:Program FilesFlightGeardatascenery
les paysages seraient recherchés dans :
c:Program FilesFlightGeardataWorldScenery
en premier, suivit par :
c:Program FilesFlightGeardatascenery.
Cela signifie que vous pouvez télécharger différents paysages à différents emplacements.
3.2 – Démarrer le simulateur sous Unix/Linux
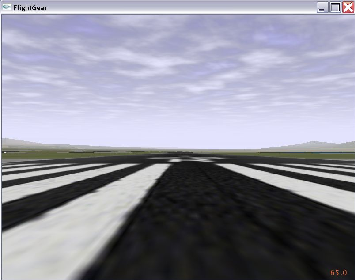
Image 3: Prêt à décoller. En attente à la position de départ par défaut, San Francisco Itl., KSFO.
Avant de pouvoir démarrer FlightGear, vous aurez besoin de paramétrer une paire de variables d’environnement.
- Vous devrez ajouter /usr/local/share/FlightGear/lib à votre LD_LIBRARY_PATH
- FG_ROOT devra pointer vers le dossier data de votre installation FlightGear. Par exemple /usr/local/share/FlightGear/data.
- FG_SCENERY doit être une liste de dossiers de paysages, séparés par « : ». Le fonctionnement est semblable à celui de PATH lors de la recherche d’un paysage.Exemple : $FG_ROOT/Scenery:$FG_ROOT/WorldScenery.
Pour les ajouter depuis Bourne shell (et compatibles) :
LD_LIBRARY_PATH=/usr/local/share/FlightGear/lib:$LD_LIBRARY_PATH
export LD_LIBRARY_PATH
FG_HOME=/usr/local/share/FlightGear
export FG_HOME
FG_ROOT=/usr/local/share/FlightGear/data
export FG_ROOT
FG_SCENERY=$FG_ROOT/Scenery:$FG_ROOT/WorldScenery
export FG_SCENERY
ou en C shell (et compatibles) :
setenv LD_LIBRARY_PATH=/usr/local/share/FlightGear/lib:$LD_LIBRARY_PATH
setenv FG_HOME=/usr/local/share/FlightGear
setenv FG_ROOT=/usr/local/share/FlightGear/data
setenv FG_SCENERY=$FG_HOME/Scenery:$FG_ROOT/Scenery:$FG_ROOT/WorldScenery
Une fois ces variables d’environnement paramétrées, démarrez tout simplement FlightGear en lançant fgfs –option1 –option2… Les options de ligne de commande sont décrites au Chapitre 3.5.
3.3 – Démarrer le simulateur sous Windows
Les binaires pré-compilés pour Windows sont livrés avec un assistant graphique au lancement de FlightGear. Cliquez tout simplement sur l’élément FlightGear Launcher du menu Démarrer, ou double-cliquez sur l’icône du bureau. Le lanceur vous permet de choisir :
- votre avion
- l’aéroport et la piste de décollage
- l’heure du jour
- les conditions météo
- … et quantité d’autres réglages environnementaux
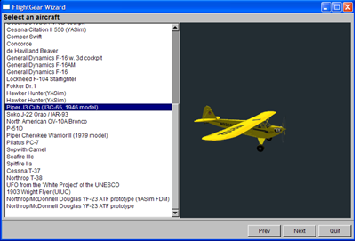
Image 4: Le lanceur FlightGear
La première fois que vous le lancerez, il vous sera demandé de remplir les variables FG_ROOT (généralement c:Program FilesFlightGeardata) et FG_SCENERY. Ce dernier doit être une liste de dossiers où vous avez installé le paysage, typiquement :
c:Program FilesFlightGeardatascenery
et
c:Program FilesFlightGeardataWorldScenery
Si vous indiquez des valeurs incorrectes ou changez vos dossiers de paysage après coup, vous pourrez corriger les valeurs en cliquant sur le bouton « Prev » de la première page du lanceur.
3.3.1 – Lancement depuis la ligne de commande
Alternativement, vous pouvez lancer FlightGear depuis la ligne de commande. Pour cela, vous devez paramétrer les variables d’environnement FG_ROOT et FG_SCENERY manuellement.
Ouvrez un Shell, placez-vous dans le dossier où réside votre binaire (typiquement quelque chose comme c:Program FilesFlightGearWin32bin), paramétrez les variables d’environnement en tappant :
SET FG_HOME=~c:Program FilesFlightGear~
SET FG_ROOT=~c:Program FilesFlightGeardata~
SET FG_SCENERY=~c:Program FilesFlightGeardataScenery~; ~c:Program FilesFlightGeardataWorldScenery~
Et appelez FlightGear (dans le même Shell, car les variables d’environnement ne sont valides que localement, dans le même Shell) par l’intermédiaire de :
fgfs --option1 --option2...
Naturellement, vous pouvez créer un fichier batch avec un éditeur de texte Windows (comme le bloc-notes) contenant les lignes ci-dessus.
Pour obtenir les meilleures performances à l’exécution il est recommandé de réduire (iconifier) la fenêtre de sortie pendant que FlightGear tourne.
3.4 – Démarrer le simulateur sous Mac OS X
Disons que vous ayez téléchargé le paquet de base et les binaires dans votre dossier personnel. Alors vous pouvez ouvrir Terminal.app et exécuter la séquence suivante :
setenv FG_ROOT ~/fgfs-base-X.X.X
./fgfs-X.X.X.-date --option1 --option 2
ou :
./fgfs-X.X.X-version-date --fg-root=~/fgfs-base-X.X.X --option1
3.5 – Paramètres de ligne de commande
Voici la liste complète et une description courte des nombreuses options de ligne de commande disponibles pour FlightGear. La plupart de ces options sont gérées par le lanceur FlightGear fourni avec les binaires Windows.
S’il y a des options que vous réutilisez régulièrement, vous pouvez les inclure dans un fichier de préférences. Comme il dépend de vos préférences, il n’est pas fourni avec FlightGear, mais peut être créé avec tout éditeur de texte (bloc-notes, emacs, vi, votre préféré).
- Sur systèmes Unix, créez un fichier .fgfsrc dans votre dossier principal.
- Sur Windows, créez un fichier system.fgfsrc, dans le dossier FG_ROOT (ex. c:Program FilesFlightGeardata).
3.5.1 – Options Générales
- –help – Affiche les options de ligne de commande les plus courantes.
- –help-verbose – Affiche toutes les options de ligne de commande.
- –fg-root=chemin – Indique à FlightGear où rechercher ses fichiers de données racine si vous ne l’avez pas compilé avec les options par défaut.
- –fg-scenery=chemin – Permet de spécifier un chemin vers les paysages de base, dans le cas ou le paysage n’est pas à l’emplacement par défaut sous $FG_ROOT/Scenery; cela peut s’avérer très utile si vous stockez les paysages sur CD-ROM.
- –disable-game-mode – Désactive l’affichage plein-écran.
- –enable-game-mode – Active l’affichage plein-écran.
- –disable-splash-screen – Désactive le logo 3DFX tournant lors de l’initialisation de la carte accélératrice (3DFX uniquement).
- –enable-splash-screen – Si vous aimez la publicité, utilisez cette option !
- –disable-intro-music – Désactive le son durant le démarrage de FlightGear. Peut résoudre les problèmes de chargement de l’intro.
- –enable-intro-music – Si votre machine est assez puissante, vous apprécierez ce paramètre.
- –disable-mouse-pointer – Désactive le pointeur de souris supplémentaire.
- –enable-mouse-pointer – Active le pointeur de souris supplémentaire. Utile en mode plein-écran pour les vieilles cartes Voodoo.
- –enable-random-objects Active les objets de paysages aléatoires (bâtiments / arbres). Activé par défaut.
- –disable-random-objects – Désactive les objets de paysage aléatoires (bâtiments / arbres).
- –disable-freeze – Permet de démarrer FlightGear moteur tournant, prêt à décoller.
- –enable-freeze – Démarre FlightGear en mode pause.
- –disable-fuel-freeze – Le carburant est consommé normalement.
- –enable-fuel-freeze – Le carburant est forcé à un niveau constant.
- –disable-clock-freeze – L’heure du jour avance normalement.
- –enable-clock-freeze – L’heure du jour n’avance pas.
- –control-mode – Spécifie le dispositif de contrôle (joystick, clavier, souris). Vaut par défaut joystick (yoke).
- –disable-auto-coordination Désactive la coordination aileron / gouvernes de direction (défaut).
- –enable-auto-coordination – Active la coordination aileron / gouvernes de direction (recommandé sans palonnier).
- –browser-app=/chemin/vers/le/programme – Spécifie l’emplacement de votre navigateur Web. Exemple: –browser-app= »C:Program FilesInternet Exploreriexplore.exe » (Notez les » » à cause des espaces !).
- –prop:nom=valeur – Donne à la propriété nom la valeur valeur – Exemple: –prop:/engines/engine0/running=true pour un démarrage moteurs tournants. Autre exemple: –aircraft=c172 –prop:/consumables/fuels/tank[0]/level-gal=10 –prop:/consumables/fuels/tank[1]/level-gal=10 remplit le Cessna pour un vol court.
- –config=chemin – Charge des propriétés additionnelles depuis le chemin donné. Exemple: fgfs –config=./Aircraft/X15-set.xml
- –units-feet – Affiche les distances en pieds.
- –units-meters – Affiche les distances en mètres.
3.5.2 – Fonctionnalités
- –disable-hud: Eteind le HUD (Head Up Display, affichage tête haute).
- –enable-hud: Allume le HUD.
- –enable-anti-aliased-hud: Active l’anti-crénelage du HUD pour une meilleure qualité, si votre matériel le supporte.
- –disable-anti-aliased-hud: Désactive l’anti-crénelage du HUD.
- –enable-panel: Active le tableau de bord (par défaut).
- –disable-panel: Désactive le tableau de bord.
- –disable-sound: Désactive le son.
- –enable-sound: Active le son.
3.5.3 – Avion
- –aircraft=nom du fichier de définition d’avion Exemple: –aircraft=c310. Pour les valeurs possibles, consultez le dossier /FlightGear/Aircraft. Ne pas inclure l’extension » -set.xml » dans le nom de l’avion mais uniquement la partie qui la précède du nom de fichier. De cette façon les modèle de vol, tableau de bord, etc … seront chargés de façon cohérente. Une liste complète est présentée au Chapitre 3.7 ci-dessous.
- –show-aircraft: Affiche une liste triée des types d’avions installés.
3.5.4 – Modèles de vol
- –fdm=abcd Sélectionne le modèle de vol du noyau. Les options sont jsb, larcsim, yasim, magic, balloon, external, pipe, ada, null. La valeur par défaut est jsb (JSBSim). larcsim est le modèle de vol dont FlightGear a hérité du simulateur LaRCSim. yasim est le « Yet Another Flight Dynamics Simulator » d’Any Ross. Magic est un mode vecteur (qui pilote l’avion OVNI). Balloon est un ballon à air chaud. External se réfère au contrôle à distance du simulateur via un socket TCP, pipe sert au contrôle local par named pipe. Null ne sélectionne aucun modèle de dynamiques de vol. Le modèle de vol UIUC n’est pas sélectionné de cette façon mais via l’option suivante ! Pour de plus amples informations sur les modèles de vol voir la Section 1.4 et suivantes.
- –aero=abcd Spécifie le modèle d’avion à charger. La valeur par défaut est un Cessna c172. Les alternatives disponibles dépendent du modèle de vol choisi.
- –model-hz=n Exécute le modèle de dynamiques de vol à cette fréquence (mises à jour par seconde).
- –speed=n Exécute le modèle de dynamiques de vol à la vitesse réelle multipliée par cette valeur.
- –notrim Ne PAS tenter d’équilibrer le modèle à l’initialisation de JSBSim.
- –on-ground: Démarrage au sol (par défaut).
- –in-air: Démarrage dans les airs. Naturellement, vous devrez préciser une altitude initiale comme expliqué plus bas pour que cela prenne sens. Idéal pour le X15.
- –wind=DIR@VIT: Précise que le vent soufflera de la direction DIR (en degrés) à la vitesse VIT (en noeuds). Les valeurs peuvent êtres indiquées par tranches en utilisant « : » comme séparateur. ex : 180:220@10:15
- –random-wind: Ajoute un vent aléatoire afin de rendre le vol plus intéressant.
3.5.5 – Position et Orientation Initiales
- –airport-id=ABCD: Si vous désirez démarrer directement depuis un aéroport, entrez son code international, par exemple KJFK pour l’aéroport JFK de New York etc. Une liste longue/courte des codes d’aéroports pris en charge peut être trouvée dans . Il vous suffit de décompresser l’un des fichiers avec gunzip. Souvenez vous cependant que vous aurez besoin des données du terrain de la région désirée !
- –offset-distance=nm: Vous pouvez préciser ici une distance du point de départ.
- –offset-azimuth=deg: Vous pouvez préciser une orientation en degrés par rapport au point de départ.
- –lon=degrés: Longitude de démarrage en degrés (ouest = -).
- –lat=degrés: Latitude de démarrage en degrés (sud = -).
- –altitude=pieds: Utile si vous désirez démarrer en vol libre, en conjonction avec –in-air. L’altitude est indiquée en pieds à moins que vous n’ayez choisi –units-meters.
- –heading=degrés: Définit l’orientation initiale (angle de lacet) en degrés.
- –roll=degrés: Définit l’angle de roulis initial en degrés.
- –pitch=degrés: Définit l’angle de tangage initial en degrés.
- –uBody=pieds par seconde: Vitesse le long de l’axe X du corps en pieds par seconde, à moins que vous n’ayez choisi –units-meters.
- –vBody=pieds par seconde: Vitesse le long de l’axe Y du corps en pieds par seconde, à moins que vous n’ayez choisi –units-meters.
- –wBody=pieds par seconde: Vitesse le long de l’axe Z du corps en pieds par seconde, à moins que vous n’ayez choisi –units-meters.
- –vc=noeuds: Permet de spécifier la vitesse au vent initiale en noeuds (uniquement en conjonction avec –fdm=jsb).
- –mach=num: Permet de spécifier la vitesse au vent initiale en nombre de Machs (uniquement en conjonction avec –fdm=jsb).
- –glideslope=degrés: Permet de spécifier un angle de course (peut être positif).
- –roc=pieds par minute: Permet de spécifier le taux de montée initial (peut être négatif).
3.5.6 – Options de rendu
- –bpp=profondeur: Specifie le nombre de bits par pixel.
- –fog-disable: Pour réduire la consommation du rendu, les régions les plus éloignées disparaissent dans le brouillard par défaut. Si vous désactivez le brouillard, vous verrez plus loin mais le nombre d’image par seconde chutera.
- –fog-fastest: Les paysages ne seront pas très jolis mais le nombre d’image par seconde augmentera.
- –fog-nicest: Cette option vous donnera une vision plutôt réaliste d’un vol par temps brumeux.
- –enable-clouds: Active la couche de nuages (par défaut).
- –disable-clouds: Désactive la couche de nuages.
- –fov=degrés: Définit l’ouverture du champ de vision en degrés. Vaut 55.0 par défaut.
- –disable-fullscreen: Désactive le mode plein-écran (par défaut).
- –enable-fullscreen: Active le mode plein-écran.
- –shading-flat: C’est le mode le plus rapide mais le terrain sera horrible ! Cette option peut aider si votre processeur graphique est vraiment lent.
- –shading-smooth: Réglage recommandé (et par défaut). Les choses devraient êtres bien rendues.
- –disable-skyblend: Pas de brouillard ou de brume, le ciel ne sera affiché que sur une seule couleur. Rapide mais moche !
- –enable-skyblend: Brouillard/brume activés, le ciel et le terrain seront réalistes. Il s’agit du réglage par défaut et recommandé.
- –disable-textures: Les détails du terrain seront désactivés. Le résultat est peu esthétique mais cela peut aider les cartes vidéos lentes.
- –enable-textures: Par défaut et recommandé.
- –enable-wireframe: Si vous souhaitez savoir de quoi à l’air le monde de FlightGear de l’intérieur, essayez cela !
- –disable-wireframe: Pas de fils de fers. Par défaut.
- –geometry=WWWxHHH: Définit les dimensions de la fenêtre de rendu, exemple WWWxHHH peut valoir 640×480, 800×600, ou 1024×768.
- –view-offset=xxx: Permet de décaler la vue avant par défaut par rapport à ce qu’elle devrait être. Les valeurs possibles sont LEFT, RIGHT, CENTER, ou une valeur en degrés. Utile dans le cas d’un affichage multi-écrans.
- –visibility=mètres: Vous pouvez spécifier ici la visibilité initiale en mètres.
- –visibility-miles=miles: Vous pouvez spécifier ici la visibilité initiale en miles.
3.5.7 – Options du HUD
- –hud-tris: Le HUD affiche le nombre de triangles rendus.
- –hud-culled: Le HUD affiche le nombre de triangles cueillis.
3.5.8 – Options de temps
- –time-match-real: Synchronise l’horloge sur l’heure internationale
- –time-match-local: Synchronize l’horloge sur l’heure locale
- –start-date-sys=aaaa:mm:jj:hh:mm:ss: Specifie une date/heure de départ en respectant l’horloge système
- –start-date-gmt=aaaa:mm:jj:hh:mm:ss : Specifie une date/heure de départ suivant le fuseau horaire de Greenwich
- –start-date-lat=aaaa:mm:jj:hh:mm:ss : Specifie une date/heure de départ suivant le fuseau horaire où se trouve l’avion
- –time-match-real : basically gives our initial behavior: Simulator time is read from the system clock, and is used as is. When your virtual flight is in the same timezone as where your computer is located, this may be desirable, because the clocks are synchronized. However, when you fly in a different part of the world, it may not be the case, because there is a number hours difference, between the position of your computer and the position of your virtual flight.
The option –time-match-local takes care of this by computing the timezone difference between your real world time zone and the position of your virtual flight, and local clocks are synchronized.
The next three options are meant to specify the exact startup time/date. The three functions differ in that the take either your computer systems local time, greenwich mean time, or the local time of your virtual flight as the reference point.
Each of these five options were designed to be used exclusively, however, the value set by these functions could be modified using the –time-offset function. The latter would add a specified amount of time to the value already set by the other functions.
3.5.9 – Network Options
- –httpd=port : Enable http server on the specified port.
- –telnet=port : Enable telnet server on the specified port.
- –jpg-httpd=port : Enable screen shot http server on the specified port.
- –enable-network-olk : Enables Oliver Delises’s multi-pilot mode.
- –disable-network-olk : Disables Oliver Delises’s multi-pilot mode (default).
- –net-hud : HUD displays network info.
- –net-id=name : Specify your own callsign
3.5.10 – Route/Waypoint Options
- –wp=ID[@alt] : Allows specifying a waypoint for the GC autopilot; it is possible to specify multiple waypoints (i.e ȧ route) via multiple instances of this command.
- –flight-plan=[file] : This is more comfortable if you have several waypoints. You can specify a file to read them from.
Note: These options are rather geared to the advanced user who knows what he is doing.
3.5.11 – IO Options
- –garmin=params : Open connection using the Garmin GPS protocol.
- –joyclient=params : Open connection to an Agwagon joystick.
- –native-ctrls=params : Open connection using the FG native Controls protocol.
- –native-fdm=params : Open connection using the FG Native FDM protocol.
- –native=params : Open connection using the FG Native protocol.
- –nmea=params : Open connection using the NMEA protocol.
- –opengc=params : Open connection using the OpenGC protocol.
- –props=params : Open connection using the interactive property manager.
- –pve=params : Open connection using the PVE protocol.
- –ray=params : Open connection using the RayWoodworth motion chair protocol.
- –rul=params : Open connection using the RUL protocol.
- –atc610x : Enable atc610x interface.
3.5.12 – Debugging options
- –trace-read=params : Trace the reads for a property; multiple instances are allowed.
- –trace-write=params : Trace the writes for a property; multiple instances are allowed.
3.6 – Joystick support
Could you imagine a pilot in his or her Cessna controlling the machine with a keyboard alone? For getting the proper feeling of flight you will need a joystick/yoke plus rudder pedals, right? However, the combination of numerous types of joysticks, flightsticks, yokes, pedals etcȯn the market with the several target operating systems, makes joystick support a nontrivial task in FlightGear.
FlightGear has integrated joystick support, which automatically detects any joystick, yoke, or pedals attached. Just try it! If this does work for you, lean back and be happy! You can see what FlightGear has detected your joystick as by selecting Help -> Joystick Information from the menu.
Unfortunately, given the several combinations of operating systems supported by FlightGear (possibly in foreign languages) and joysticks available, chances are your joystick does not work out of the box. Basically, there are two alternative approaches to get it going, with the first one being preferred.
3.6.1 Built-in joystick support
General remarks
In order for joystick auto-detection to work, a joystick bindings xml file must exist for each joystick. This file describes what axes and buttons are to be used to control which functions in FlightGear. The associations between functions and axes or buttons are called “bindings”. This bindings file can have any name as long as a corresponding entry exists in the joysticks description file
/FlightGear/joysticks.xml
which tells FlightGear where to look for all the bindings files. We will look at examples later.
FlightGear includes several such bindings files for several joystick manufacturers in folders named for each manufacturer. For example, if you have a CH Products joystick, look in the folder
/FlightGear/Input/Joysticks/CH
for a file that might work for your joystick. If such a file exists and your joystick is working with other applications, then it should work with FlightGear the first time you run it. If such a file does not exist, then we will discuss in a later section how to create such a file by cutting and pasting bindings from the examples that are included with FlightGear.
Verifying your joystick is working
Does your computer see your joystick? One way to answer this question under Linux is to reboot your system and immediately enter on the command line
$ dmesg | grep Joystick
which pipes the boot message to grep which then prints every line in the boot message that contains the string “Joystick”. When you do this with a Saitek joystick attached, you will see a line similar to this one:
input0: USB HID v1.00 Joystick [SAITEK CYBORG 3D USB] on usb2:3.0
This line tells us that a joystick has identified itself as SAITEK CYBORG 3D USB to the operating system. It does not tell us that the joystick driver sees your joystick. If you are working under Windows, the method above does not work, but you can still go on with the next paragraph.
Confirming that the driver recognizes your joystick
FlightGear ships with a utility called js demo. It will report the number of joysticks attached to a system, their respective “names”, and their capabilities. Under Linux, you can run js demo from the folder /FlightGear/bin as follows:
$ cd /usr/local/FlightGear/bin
$ ° / js demo
Under Windows, open a command shell (Start|All Programs|Accessories), go to the FlightGear binary folder and start the program as follows (given FlightGear is installed under c:Flightgear)
cd FlightGearbin
js demo.exe
On our system, the first few lines of output are (stop the program with ˆ C if it is quickly scrolling past your window!) as follows:
Joystick test program.
Joystick 0: “CH PRODUCTS CH FLIGHT SIM YOKE USB ”
Joystick 1: “CH PRODUCTS CH PRO PEDALS USB”
Joystick 2 not detected
Joystick 3 not detected
Joystick 4 not detected
Joystick 5 not detected
Joystick 6 not detected
Joystick 7 not detected
+——————–JS.0———————-+——————–JS.1———————-+
| Btns Ax:0 Ax:1 Ax:2 Ax:3 Ax:4 Ax:5 Ax:6 | Btns Ax:0 Ax:1 Ax:2 |
+———————————————-+———————————————-+
| 0000 +0.0 +0.0 +1.0 -1.0 -1.0 +0.0 +0.0 . | 0000 -1.0 -1.0 -1.0 . . . . . |
First note that js demo reports which number is assigned to each joystick recognized by the driver. Also, note that the “name” each joystick reports is also included between quotes. We will need the names for each bindings file when we begin writing the binding xml files for each joystick.
Identifying the numbering of axes and buttons
Axis and button numbers can be identified using js demo as follows. By observing the output of js demo while working your joystick axes and buttons you can determine what axis and button numbers are assigned to each joystick axis and button. It should be noted that numbering generally starts with zero.
The buttons are handled internally as a binary number in which bit 0 (the least significant bit) represents button 0, bit 1 represents button 1, etc., but this number is displayed on the screen in hexadecimal notation, so:
0001 ⇒ button 0 pressed
0002 ⇒ button 1 pressed
0004 ⇒ button 2 pressed
0008 ⇒ button 3 pressed
0010 ⇒ button 4 pressed
0020 ⇒ button 5 pressed
0040 ⇒ button 6 pressed
... etc˙u p to ...
8000 ⇒ button 15 pressed
... and ...
0014 ⇒ buttons 2 and 4 pressed simultaneously
... etc.
For Linux users, there is another option for identifying the “name” and the numbers assigned to each axis and button. Most Linux distributions include a very handy program, “jstest”. With a CH Product Yoke plugged into the system, the following output lines are displayed by jstest:
jstest /dev/js3
Joystick (CH PRODUCTS CH FLIGHT SIM YOKE USB ) has 7 axes and 12 buttons. Driver version is 2.1.0
Testing…(interrupt to exit)
Axes: 0: 0 1: 0 2: 0 3: 0 4: 0 5: 0 6: 0 Buttons: 0:off 1:off 2:off 3:on 4:off 5:off 6:off 7:off 8:off 9:off 10:off 11:off
Note the “name” between parentheses. This is the name the system associates with your joystick.
When you move any control, the numbers change after the axis number corresponding to that moving control and when you depress any button, the “off” after the button number corresponding to the button pressed changes to “on”. In this way, you can quickly write down the axes numbers and button numbers for each function without messing with binary.
Writing or editing joystick binding xml files
At this point, you have confirmed that the operating system and the joystick driver both recognize your joystick(s). You also know of several ways to identify the joystick “name” your joystick reports to the driver and operating system. You will need a written list of what control functions you wish to have assigned to which axis and button and the corresponding numbers.
Make the following table from what you learned from js demo or jstest above (pencil and paper is fine). Here we assume there are 5 axes including 2 axes associated with the hat.
| Axis | Button |
|---|---|
| elevator = 0 | view cycle = 0 |
| rudder = 1 | all brakes = 1 |
| aileron = 2 | up trim = 2 |
| throttle = 3 | down trim = 3 |
| leftright hat = 4 | extend flaps = 4 |
| foreaft hat = 5 | retract flaps = 5 |
| decrease RPM = 6 | |
| increase RPM = 7 |
We will assume that our hypothetical joystick supplies the “name” QUICK STICK 3D USB to the system and driver. With all the examples included with FlightGear, the easiest way to get a so far unsupported joystick to be auto detected, is to edit an existing binding xml file. Look at the xml files in the sub-folders of /FlightGear/Input/Joysticks/. After evaluating several of the xml binding files supplied with FlightGear, we decide to edit the file
/FlightGear/Input/Joysticks/Saitek/Cyborg-Gold-3d-USB.xml.
This file has all the axes functions above assigned to axes and all the button functions above assigned to buttons. This makes our editing almost trivial.
Before we begin to edit, we need to choose a name for our bindings xml file, create the folder for the QS joysticks, and copy the original xml file into this directory with this name.
$ cd /usr/local/FlightGear/Input/Joysticks
$ mkdir QS
$ cd QS
$ cp /usr/local/FlightGear/Input/Joysticks/Saitek/
Cyborg-Gold-3d-USB.xml QuickStick.xml
Here, we obviously have supposed a Linux/UNIX system with FlightGear being installed under /usr/local/FlightGear. For a similar procedure under Windows with FlightGear being installed under c:FlightGear, open a command shell and type
c:
cd /FlightGear/Input/Joysticks
mkdir QS
cd QS
copy /FlightGear/Input/Joysticks/Saitek/
Cyborg-Gold-3d-USB.xml QuickStick.xml
Next, open QuickStick.xml with your favorite editor. Before we forget to change the joystick name, search for the line containing . You should find the line
SAITEK CYBORG 3D USB
and change it to
QUICK STICK 3D USB.
This line illustrates a key feature of xml statements. They begin with a and end with a .
You can now compare your table to the comment table at the top of your file copy. Note that the comments tell us that the Saitek elevator was assigned to axis 1. Search for the string
<axis n=~1~>
and change this to
<axis n=~0~>.
Next, note that the Saitek rudder was assigned to axis 2. Search for the string
<axis n=~2~>
and change this to
<axis n=~1~>.
Continue comparing your table with the comment table for the Saitek and changing the axis numbers and button numbers accordingly. Since QUICKSTICK USB and the Saitek have the same number of axes but different number of buttons, you must delete the buttons left over. Just remember to double check that you have a closing tag for each opening tag or you will get an error using the file.
Finally, be good to yourself (and others when you submit your new binding file to a FlightGear developers or users archive!), take the time to change the comment table in the edited file to match your changed axis and button assignments. The new comments should match the table you made from the js demo output. Save your edits.
Several users have reported that the numbers of axes and buttons assigned to functions may be different with the same joystick under Windows and Linux. The above procedure should allow one to easily change a binding xml file created for a different operating system for use by their operating system.
Telling FlightGear about your new bindings xml file
Before FlightGear can use your new xml file, you need to edit the file
/FlightGear/joysticks.xml,
adding a line that will include your new file if the “name” you entered between the name tags matches the name supplied to the driver by your joystick. Add the following line to joysticks.xml.
<js-named include=~Input/Joysticks/QS/QuickStick.xml~/>
You can tell how FlightGear has interpretted your joystick setup by selecting Help -> Joystick Information from the Menu.
Some hints for Windows users
Basically, the procedures described above should work for Windows as well. If your joystick/yoke/pedals work out of the box or if you get it to work using the methods above, fine. Unfortunately there may be a few problems.
The first one concerns users of non-US Windows versions. As stated above, you can get the name of the joystick from the program js demo. If you have a non-US version of Windows and the joystick .xml files named above do not contain that special name, just add it on top of the appropriate file in the style of
<name>Microsoft-PC-Joysticktreiber </name>
No new entry in the base joysticks.xml file is required.
Unfortunately, there is one more loophole with Windows joystick support. In case you have two USB devices attached (for instance a yoke plus pedals), there may be cases, where the same driver name is reported twice. In this case, you can get at least the yoke to work by assigning it number 0 (out of 0 and 1). For this purpose, rotate the yoke (aileron control) and observe the output of js demo. If figures in the first group of colons (for device 0) change, assignment is correct. If figures in the second group of colons (for device 1) change, you have to make the yoke the preferred device first. For doing so, enter the Windows “Control panel”, open “Game controllers” and select the “Advanced” button. Here you can select the yoke as the “Preferred” device. Afterward you can check that assignment by running js demo again. The yoke should now control the first group of figures.
Unfortunately, we did not find a way to get the pedals to work, too, that way. Thus, in cases like this one (and others) you may want to try an alternative method of assigning joystick controls.
3.6.2 Joystick support via .fgfsrc entries
Fortunately, there is a tool available now, which takes most of the burden from the average user who, maybe, is not that experienced with XML, the language which these files are written in.
For configuring your joystick using this approach, open a command shell (command prompt under windows, to be found under Start|All programs|Accessories). Change to the directory /FlightGear/bin via e.g. (modify to your path)
cd c:FlightGearbin
and invoke the tool fgjs via
./fgjs
on a UNIX/Linux machine, or via
fgjs
on a Windows machine. The program will tell you which joysticks, if any, were detected. Now follow the commands given on screen, i.eṁove the axis and press the buttons as required. Be careful, a minor touch already “counts” as a movement. Check the reports on screen. If you feel something went wrong, just re-start the program.
After you are done with all the axis and switches, the directory above will hold a file called fgfsrc.js. If the FlightGear base directory FlightGear does not already contain an options file .fgfsrc (under UNIX)/system.fgfsrc (under Windows) mentioned above, just copy
fgfsrc.js into .fgfsrc (UNIX)/system.fgfsrc (Windows)
and place it into the directory FlightGear base directory FlightGear. In case you already wrote an options file, just open it as well as fgfsrc.js with an editor and copy the entries from fgfsrc.js into .fgfsrc/system.fgfsrc. One hint: The output of fgjs is UNIX formatted. As a result, Windows Editor may not display it the proper way. I suggest getting an editor being able to handle UNIX files as well (and oldie but goldie in this respect is PFE, just make a web search for it). My favorite freeware file editor for that purpose, although somewhat dated, is still PFE, to be obtained from
http://www.lancs.ac.uk/people/cpaap/pfe/.
The the axis/button assignment of fgjs should, at least, get the axis assignments right, its output may need some tweaking. There may be axes moving the opposite way they should, the dead zones may be too small etc. For instance, I had to change
–prop:/input/joysticks/js[1]/axis[1]/binding/factor=-1.0
into
–prop:/input/joysticks/js[1]/axis[1]/binding/factor=1.0
(USB CH Flightsim Yoke under Windows XP). Thus, here is a short introduction into the assignments of joystick properties.
Basically, all axes settings are specified via lines having the following structure:
–prop:/input/joysticks/js[n]/axis[m]/binding
/command=property-scale (one line)
–prop:/input/joysticks/js[n]/axis[m]/binding
/property=/controls/steering option (one line)
–prop:/input/joysticks/js[n]/axis[m]/binding
/dead-band=db (one line)
–prop:/input/joysticks/js[n]/axis[m]/binding
/offset=os (one line)
–prop:/input/joysticks/js[n]/axis[m]/binding
/factor=fa (one line)
where
n = number of device (usually starting with 0)
m = number of axis (usually starting with 0)
steering option = elevator, aileron, rudder, throttle, mixture, pitch
dead-band = range, within which signals are discarded;
useful to avoid jittering for minor yoke movements
offset = specifies, if device not centered in its neutral position
factor = controls sensitivity of that axis; defaults to +1,
with a value of -1 reversing the behavior
You should be able to at least get your joystick working along these lines. Concerning all the finer points, for instance, getting the joystick buttons working, John Check has written a very useful README being included in the base package to be found under FlightGear/Docs/Readme/Joystick.html. In case of any trouble with your input device, it is highly recommended to have a look into this document.
3.7 A glance over our hangar
The following table lists most of the aircraft presently available in the FlightGear CVS repositry. Your installation will include a sub-set of these, chosen by your distributor. Further aircraft can be downloaded from http://www.flightgear.org/Downloads/aircraft/index.shtml. See Chapter 2 for instructions on how to install them.
In the first column, you will find the name of the aircraft, the second one provides the –aircraft= start option if you are using the command line, the third one names the FDM (flight dynamics management model, see Sec. 1.4), and the last column includes some remarks. Here, “no exterior model” means that there is no aircraft specific external model available. As a result, you will see the default blue-yellow glider when you change to the external view.
| Aircraft type | –aircraft option | FDM | Remarks |
|---|---|---|---|
| 1903 Wright Flyer | wrightFlyer1903 | UIUC | The very first powered aircraft |
| A6M2 Zero | A6M2 | YASim | Japanese WWII fighter |
| Aerostar Super 700 | aerostar700 | YASim | Twin-engined light aircraft |
| Airbus A300 | A300 | JSBSim | 2-engined airliner |
| Airbus A320 | A320 | JSBSim | 2-engined airliner |
| Airbus A320 | A320 | JSBSim | 2-engined airliner |
| Airbus A320-131 | A320-111 | JSBSim | 2-engined airliner |
| Airbus A300-111 | A320-131 | JSBSim | 2-engined airliner |
| Airbus A380 | A380 | JSBSim | 4-engined double-decker airliner |
| Airwave Xtreme 150 | airwaveXtreme150 | UIUC | Hang-glider |
| Anotov AN-2 | an2 | JSBSim | Russian light transport biplane |
| Antonov AN-225 | AN-225 | YASim | Russian over-sized cargo aircraft |
| ASW-20 sailplane | asw20 | YASim | Glider |
| ASW-20 sailplane (UIUC) | asw20-v1-nl-uiuc | UIUC | Glider |
| Avro Vulcan B.2 | vulcanb2 | JSBSim | British sub-sonic strategic bomber |
| BAC TSR2 | BAC-TSR2 | YASim | Ill-fated strike aircraft |
| Beech 99 | beech99-v1-uiuc | UIUC | Twin-engined turbo-prop aircraft |
| Beech 99 | beech99-yasim | YASim | Twin-engined turbo-prop aircraft |
| Beechcraft B1900D | b1900d | YASim | Twin-engined turbo-prop aircraft |
| Bell 206 JetRanger | bell206 | YASim | Helicopter |
| Boeing 314 | Boeing314A | JSBSim | Flying boat airline |
| Boeing 707 | 707 | JSBSim | 4-engined early jet airliner |
| Boeing 737-300 | 737-300 | JSBSim | 2-engined airliner |
| Boeing 747 | 747 | YASim | 4-engined airliner |
| Boeing 747-100 | 747-100 | JSBSim | 4-engined airliner |
| Boeing 747-200 | 747-200 | JSBSim | 4-engined airliner |
| Boeing 787-8 Dreamliner | 787 | YASim | 2-engined airliner |
| Boeing B-29 Superfortress | b29 | YASim | 4-engined strategic prop bomber |
| Boeing B-29 Superfortress | b29-jsbsim | JSBSim | 4-engined strategic prop bomber |
| Boeing B-29 Superfortress | b29-yasim | YASim | 4-engined strategic prop bomber |
| Boeing B-52F | B-52F | YASim | Strategic bomber |
| Boeing CH47 Chinook | ch47 | YASim | Helicopter |
| Boeing E-3B | E3B | JSBSim | Airborne Warning and Control System (AWACS) |
| Boeing KC-135 | KC135 | JSBSim | Air-to-air refueling tanker |
| Bristol Beaufighter TF X | beaufighter | YASim | 4-engined strategic prop bomber |
| British Aerospace Harrier | harrier | YASim | VTOL jet fighter/bomber |
| Canberra BI8 | CanberraBI8 | YASim | First-generation jet bomber |
| Cessna 150x prototype | c150 | JSBSim | Light aircraft |
| Cessna 172P Skyhawk (1981 model) | c172p | JSBSim | Light aircraft (default) |
| Cessna 172P Skyhawk (1981 model), 2D panel | c172p-2dpanel | JSBSim | Light aircraft |
| Cessna 172R | c172r | JSBSim | Light aircraft |
| Cessna 182 | c182 | JSBSim | Light aircraft |
| Cessna 182 (2D panel) | c182-2dpanel | JSBSim | Light aircraft |
| Cessna 310R | c310 | JSBSim | Twin-engined light aircraft |
| Cessna 310R with IFR panel | c310-ifr | JSBSim | Twin-engined light aircraft |
| Cessna 310 (YASim) | c310-yasim | YASim | Twin-engined light aircraft |
| Cessna 310R (1979 model) with 3D cockpit | c310dpm-3d | JSBSim | Twin-engined light aircraft |
| Cessna 310U3A w. 3D cockpit | c310u3a | JSBSim | US Navy twin-engined light aircraft |
| Cessna 310U3A | c310u3a-jsbsim | JSBSim | US Navy twin-engined light aircraft |
| Cessna Citation-Bravo | Bravo | YASim | Executive jet |
| Cessna Citation-II | Citation-II | YASim | Executive jet |
| Cessna T-37 | T37 | JSBSim | Jet training aircraft |
| ComperSwift | ComperSwift | YASim | 1930s air-racing monoplane |
| Colditz Escape Glider | colditz | JSBSim | Glider |
| Concorde | Concorde | JSBSim | Supersonic airliner |
| Dassault Mirage 2000C/RDI | mirage2000 | JSBSim | French delta-winged fighter |
| Douglas A4 Skyhawk (YASim) | a4 | YASim | US Navy attack aircraft |
| Douglas A4D (A-4C) Skyhawk | a4-uiuc | UIUC | US Navy attack aircraft |
| Douglas A4F Skyhawk | a4f | YASim | US Navy attack aircraft |
| Douglas DC-3 | dc3 | YASim | Twin-engined early airliner |
| Ecureuil AS 350 | as350 | YASim | Helicopter |
| English Electric Lightning F.1A | lightning | JSBSim | British supersonic fighter |
| Eurocopter Bo105 | bo105 | YASim | Helicopter |
| Eurocopter EC135 | ec135 | YASim | Helicopter |
| Fairchild-Republic A-10 | A-10 | YASim | Close Air Support Attack Aircraft |
| Fokker 100 | fokker100 | JSBSim | 2-engined airliner |
| Fokker 50 | fokker50 | JSBSim | 2-engined turboprop airliner |
| Fokker 70 | fokker70 | JSBSim | 2-engined airliner |
| Fokker Dr.1 | fkdr1-v1-nl-uiuc | UIUC | German WWI fighter |
| Aircraft type | –aircraft option | FDM | Remarks |
|---|---|---|---|
| General Dynamics F-16 | f16 | JSBSim | Fighter |
| General Dynamics F-16 w. 3d cockpit | f16-3d | JSBSim | Fighter |
| General Dynamics F-16AM | f16-mlu | JSBSim | Fighter |
| General Dynamics F-16AT (Falcon-21) | f16at | JSBSim | Fighter |
| de Havilland Beaver (floats) | dhc2F | YASim | Single-engined bush-plane |
| de Havilland Beaver (wheels) | dhc2W | YASim | Single-engined bush-plane |
| de Havilland SeaVixen FAW2 | sea-vixen | YASim | British carrier-borne jet aircraft |
| Hawker Hunter GA11 | hunter | YASim | Jet fighter |
| Hawker Hunter 2 Tanks | hunter-2tanks | YASim | Jet fighter |
| Hawker Hurricane IIb | hurricaneIIb | YASim | British WWII fighter |
| Hawker Seahawk | seahawk | YASim | British carrier-borne jet aircraft |
| Junkers Ju-52-3m | ju52 | YASim | German 3-engined transport/bomber |
| Lockheed 1049 | Lockheed1049 | JSBSim | Prop airliner |
| Lockheed F-104 Starfighter | f104 | JSBSim | 1960s supersonic interceptor |
| Lockheed F-80C | F80C | JSBSim | First USAF jet-fighter |
| McDonell Douglas F-15 Eagle | f15 | JSBSim | Air superiority Fighter |
| McDonnel Douglas MD11 | MD11 | JSBSim | 3-engined wide-body airliner |
| McDonnel Douglas MD11 | MD11-FINNAIR | JSBSim | MD11 in FinnAir livery |
| McDonnel Douglas MD11 | MD11-KLM | JSBSim | MD11 in KLM livery |
| Messerschmitt BF-109 G14 | bf109 | YASim | German WWII fighter |
| Messerschmitt BF-109 G14 | bf109g | YASim | German WWII fighter |
| MiG-15bis | MiG-15bis | YASim | Russian early jet fighter |
| NTPS | NTPS | YASim | YF-23 ATF prototype |
| NTPS-Eng | NTPS-Eng | YASim | NTPS Engineer panel |
| NTPS-HD1 | NTPS-HD1 | YASim | NTPS Heads Down Display 1 |
| NTPS-HD2 | NTPS-HD2 | YASim | NTPS Heads Down Display 2 |
| NTPS-OTW-HUD | NTPS-OTW-HUD | YASim | NTPS OTW with HUD |
| NTPS-OTW-NOHUD | NTPS-OTW-NOHUD | YASim | NTPS OTW without HUD |
| NTPS-OTW-NOHUD | NTPS-OTW-NOHUD | YASim | NTPS OTW without HUD |
| North American OV-10A | OV10_CDF | JSBSim | California Department of Forestry |
| North American OV-10A | OV10_NASA | JSBSim | NASA |
| North American OV-10A | OV10_USAFE | JSBSim | US Airforce |
| North American P-51D | p51d | YASim | WWII fighter |
| North American X-15 | X15 | YASim | Rocketplane |
| North American X-15 | X15-new | JSBSim | Rocketplane |
| Northrop T-38 | T38 | JSBSim | Super-sonic jet training aircraft |
| Northrop/MD YF-23 | YF-23 | YASim | Prototype fighter aircraft |
| ogeL experimental | ogel | JSBSim | Educational aircraft |
| Ornithopter | ornithopter | UIUC | Bird-like aircraft |
| paraglider | paraglider | JSBSim | Paraglider |
| Pilatus PC-7 | pc7 | JSBSim | Turbo-prop training aircraft |
| Piper J3C-65 Cub | j3cub | YASim | Classic light aircraft (1946 model) |
| Piper PA24-250 Comanche 250 | pa24-250 | YASim | Light aircraft (1962 model) |
| Piper PA28-161 Cherokee Warrior II | pa28-161 | YASim | Light aircraft (1979 model) |
| Piper PA34-200T Seneca II | SenecaII-jsbsim | JSBSim | Twin-engined piston aircraft |
| Piper PA34-200T Seneca II | SenecaII-yasim | YASim | Twin-engined piston aircraft |
| Rascal 110 | Rascal110-JSBSim | JSBSim | Radio Controlled model |
| Rascal 110 | Rascal110-YASim | YASim | Radio Controlled model |
| Santa Claus (3d cockpit) | santa | YASim | Unique supersonic, cargo aircraft |
| Schweizer 2-33 | sgs233 | YASim | Glider |
| Siai Marchetti S.211 (UIUC) | marchetti | UIUC | Italian fast light aircraft |
| Sikorsky CH-53E Super Stallion | ch53e | YASim | Helicopter |
| Sikorsky S76C | s76c | YASim | Helicopter |
| Soko J-22 Orao / IAR-93 | j22 | YASim | Yugoslav/Rumanian aircraft |
| Sopwith Camel 1F.1 | sopwithCamel | UIUC | British WWI fighter |
| Sopwith Camel | sopwithCamel-v1-nl-uiuc | UIUC | British WWI British fighter |
| Space Shuttle | shuttle | JSBSim | Re-entry simulation |
| Sukoi SU-37 | SU-37 | YASim | Russian multi-role jet aircraft |
| Supermarine Seafire MkIIIc | seafireIIIc | YASim | British WWII carrier prop aircraft |
| Supermarine Spitfire IIa | spitfireIIa | YASim | British WWII fighter |
| Tupolev TU-114 | TU-114 | YASim | Russian 4-engined turboprop airliner |
| Tupolev TU-154 | tu154 | YASim | Russian 3-engined jet airliner |
| UFO | ufo | ufo | From the ’White Project’ of UNESCO |
| USAF/NACA X-24B | x24b | JSBSim | Re-entry testbed |
| Vought F4U-1 Corsair | f4u | YASim | Carrier-capable fighter/bomber |
| Yard Stik | YardStik | JSBSim | Radio controlled model |